Triangulation Set Up, Update and Navigation
Table of Contents
- Tutorial Videos
- How to navigate to the Triangulation View
- How to set up your Triangulation View
- How to Update your Triangulation View
- The Trash Can Icon
- How to Delete Old Kits Without Starting Over
Tutorial Videos
How to navigate to the Triangulation View
Click on DNA tools in the left side menu. Click on the DNA Kit you wish to see. This opens the List View for that kit. The DNA menu is accessed by clicking on the down arrow inside a blue circle at the upper left of your List View.
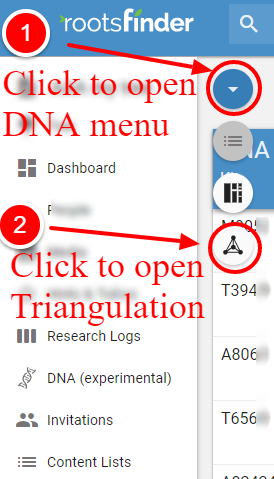
The first icon is for the List View. The third icon is for the Triangulation (cluster) View. For more information on these views please see
How to set up your Triangulation View
Note: you must import list and segments before you can import triangulation. Triangulation requires a GEDmatch Tier 1 Plan.
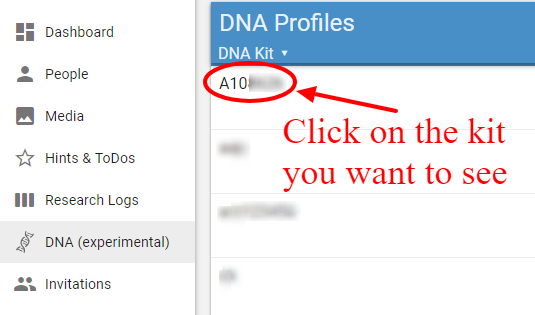
Click on DNA in the left side menu. This opens your list of DNA profiles. You may have multiple profiles for different people in your tree. Select the kit number for the profile you wish to use.
The next screen is the List View. Click on the down arrow in the blue circle to open the DNA menu. Click on the Triangulation icon.
Instructions for uploading your triangulation data are in a gray instruction box. Which are:
- Log into GedMatch.com. Select Triangulation under the Tier 1 utilities.
- Enter your kit number, set Display Options to Show results sorted by kit number, and click Triangulate.
- Once the DNA Matches are displayed, press Control-A (for PC Users) or Command-A (for Mac users) to select the entire page, then Control-C (for PC Users) or Command-C (for Mac users) to copy.
- Open your DNA tools at RootsFinder.com.
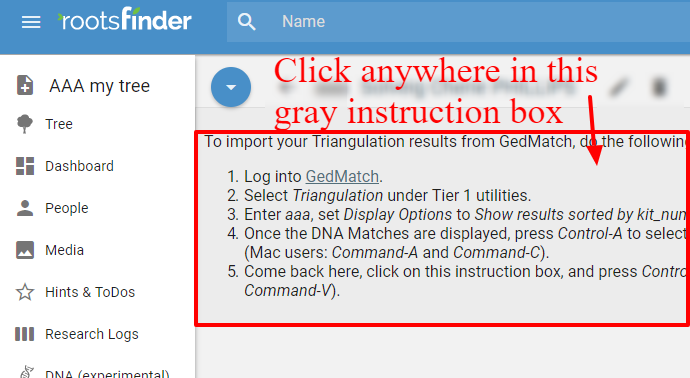
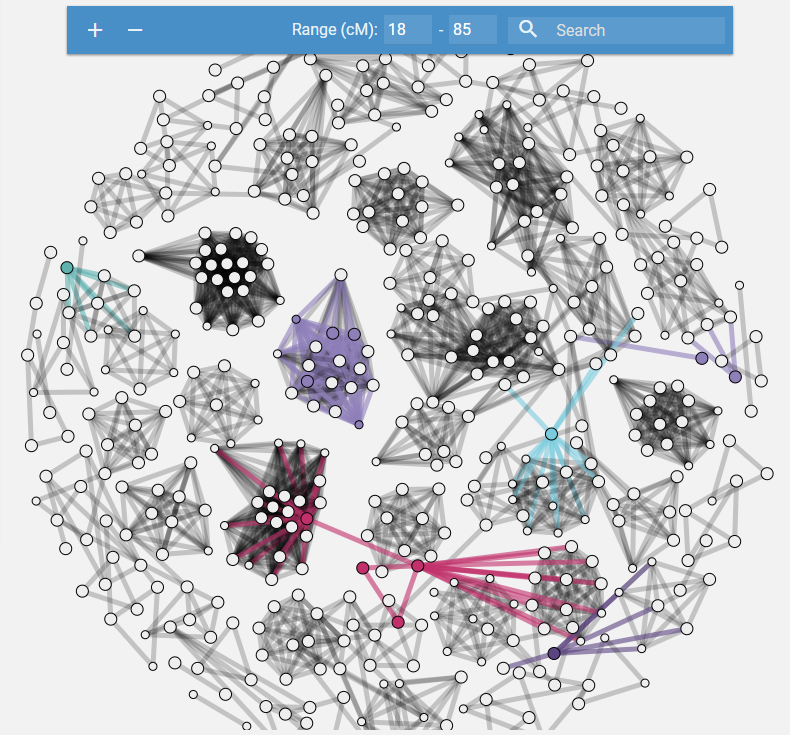
Click on the gray instruction box and press Control-V (for PC Users) or Command-V (for Mac users). And get this:
How to update your Triangulation View
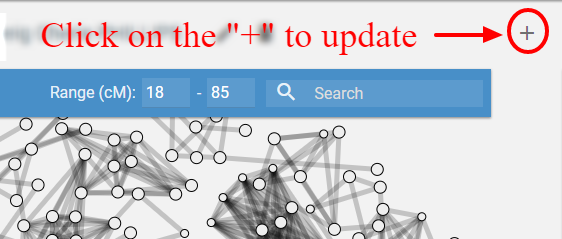
1. First, you must update your List and Segment Views. Then, open your Triangulation View. Click on the "+" at the upper right corner of the Triangulation View.
 2.
2.
Then, click on the check box if you want to delete existing matches before adding new matches. This may be desirable if you have created a new GEDmatch report that excludes matches that were in the original file. If this box is left unchecked, new matches will be merged into existing matches. In either case, existing notes and tree assignments will be preserved.
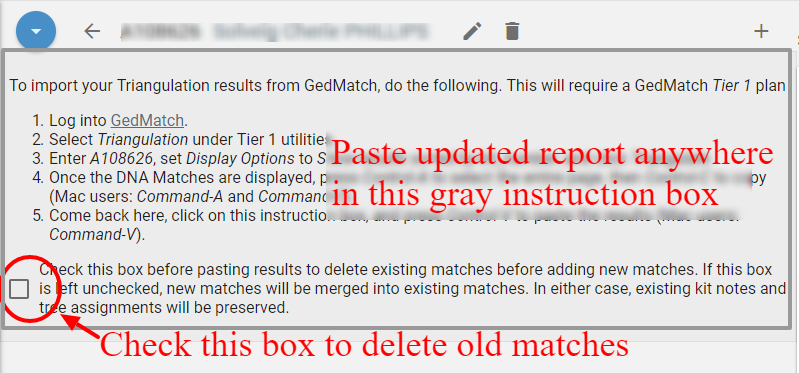
3. Finally, press Control-V (for PC Users) or Command-V (for Mac users) to paste inside the instruction box to copy the updates into your Triangulation View.
The trashcan Icon
Clicking on the trashcan icon deletes all your views. However, the kits and their matches to your tree are stored. That way, if you upload another kit and it has the same kit(s) in it, they will already be matched to your tree.
How to Delete Old Kits Without Starting Over
Caution: Do not click on the trashcan icon. It will delete your entire profile and you will have to start over.
- Click on the "+" in the upper right.This will open a window to upload the new segments.
- Check the box at the bottom of the window to delete all the old kits.
- Follow the directions to import the new Triangulation information.
