How to Start a Tree with a GEDCOM
How to Start a Tree with a GEDCOM
After logging in, you open to the landing page. The Demo Theater on the right has a huge library of tutorial videos. You might want to watch few before building your tree.
To start your tree click on the "+ New Tree" on the left side.

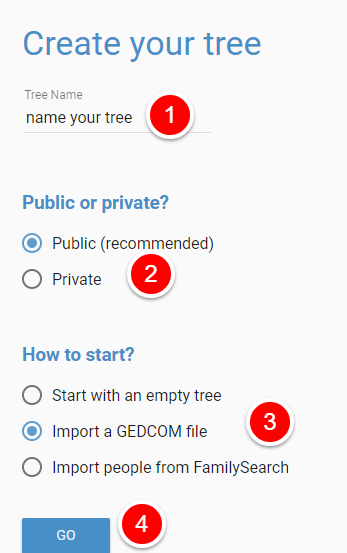
Fill in all the blanks on the next screen. You cannot leave any of the fields blank.
- Give your tree a name.
- Choose whether your tree will be public or private.
- Click on Start with an empty tree (if you wish to manually enter the information), Import a GEDCOM or Import people from Family Search.
- The "GO" button will turn blue when you have completed 1-3. Click on the blue Go button.
Import Your GEDCOM
- Click on Choose File. Navigate to the GEDCOM file you wish to import.
- Enter the name of the root person. This is the person you want at the beginning of your tree. Most people put themselves if they are in the GEDCOM.
- The "GO" button will turn blue when you have entered all the necessary information.

Your GEDCOM will be uploaded shortly, depending on how large and how many GEDCOMs are ahead of yours in the queue. It usually only takes a few minutes. You can wait or close the tab. You'll get an email when your import is complete.